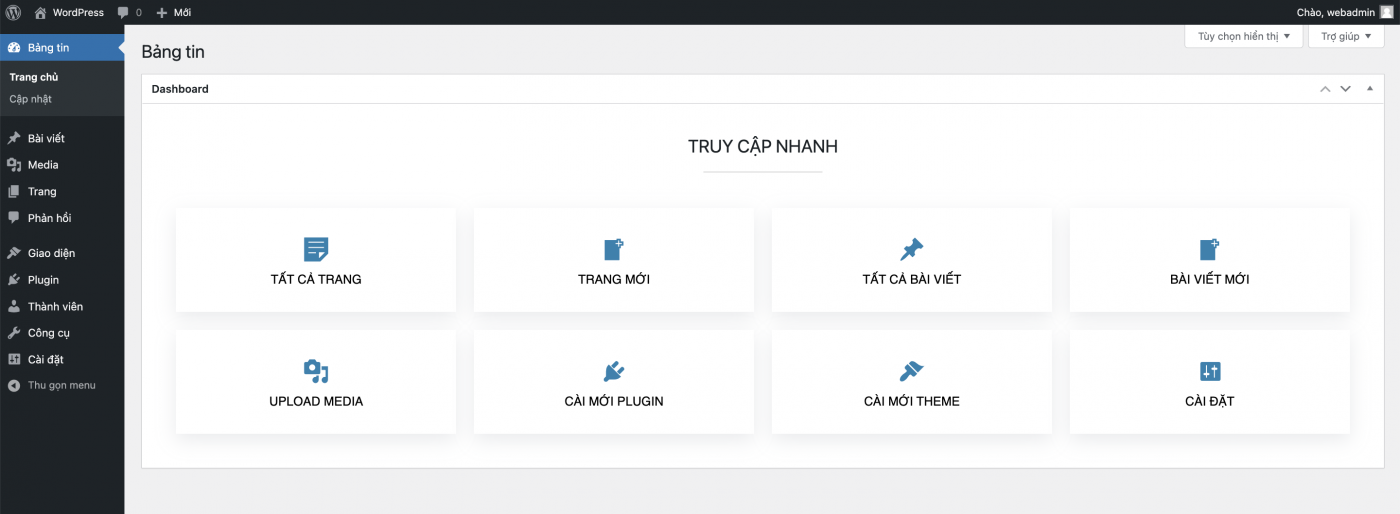
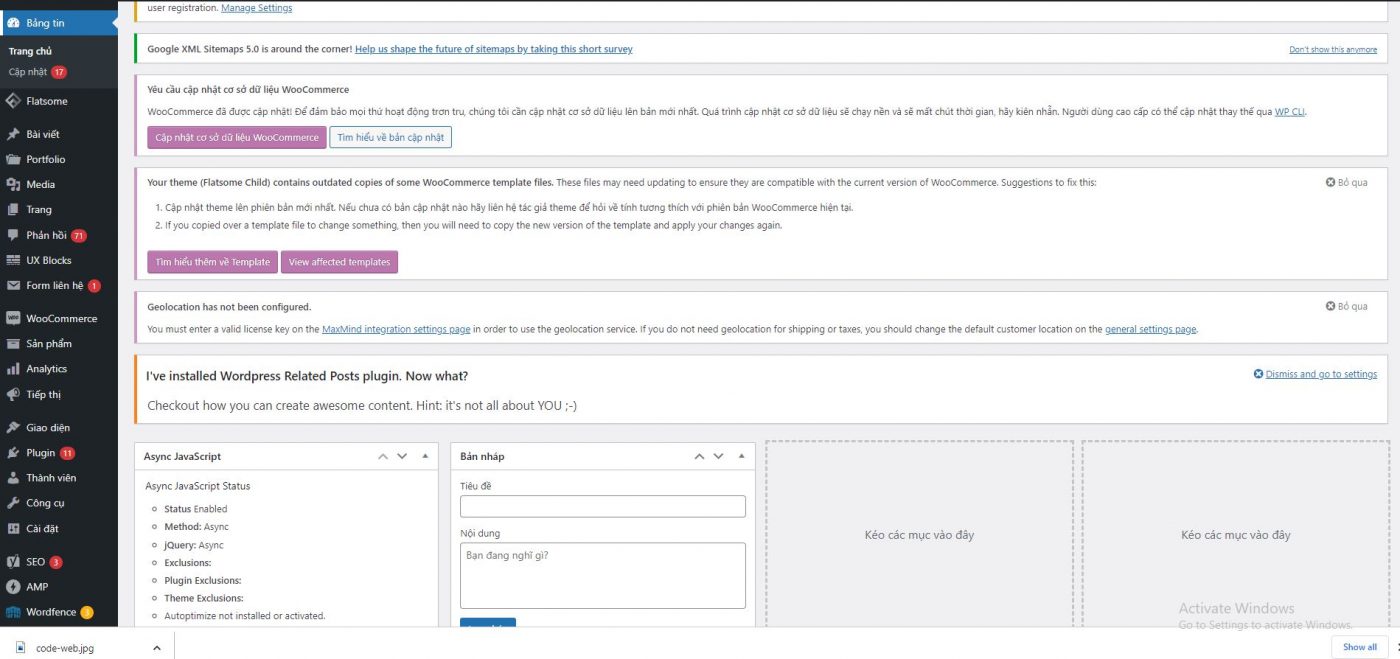
Xin chào các bạn, bạn thấy trong bảng tin wordpress rất nhiều thông tin phức tạp không gọn gàng nhìn hơi dối, vậy làm sao xóa bớt các những thứ không cần thiết và thiết kế lại bảng tin đẹp hơn thì hôm nay Win Win Media giới thiệu cùng bạn cách làm chi tiết nhé. Dưới đây là hình ảnh bảng tin ban đầu.
Xoá các widget mặc định của WordPress
Việc đầu tin là chúng ta cần xóa các widget mặc định của wordpress Hãy thêm đoạn code dưới đây vào file functions.php của theme bạn nhé.
function hk_remove_dashboard_widgets() {
global $wp_meta_boxes;
remove_meta_box( ‘dashboard_primary’,’dashboard’,’side’ ); // WordPress.com Blog
remove_meta_box( ‘dashboard_plugins’,’dashboard’,’normal’ ); // Plugins
remove_meta_box( ‘dashboard_right_now’,’dashboard’, ‘normal’ ); // Tin nhanh
remove_action( ‘welcome_panel’,’wp_welcome_panel’ ); // Welcome Panel
remove_action( ‘try_gutenberg_panel’, ‘wp_try_gutenberg_panel’); // Giới thiệu Gutenberg
remove_meta_box(‘dashboard_quick_press’,’dashboard’,’side’); // Bản nháp
remove_meta_box(‘dashboard_recent_drafts’,’dashboard’,’side’); // Bản nháp gần đây
remove_meta_box(‘dashboard_secondary’,’dashboard’,’side’); // WordPress News
remove_meta_box(‘dashboard_recent_comments’,’dashboard’,’normal’); // Bình luận
remove_meta_box(‘dashboard_activity’,’dashboard’, ‘normal’); // Hoạt động
unset( $wp_meta_boxes[‘dashboard’][‘normal’][‘core’][‘dashboard_site_health’] ); // Tình trạng website
}
add_action( ‘wp_dashboard_setup’, ‘hk_remove_dashboard_widgets’ );
Tạo custom widget trong bảng tin
Hãy tiếp tục thêm đoạn code sau vào file functions.php nhé.
function hk_welcome_dashboard() {
global $wp_meta_boxes;
wp_add_dashboard_widget(‘custom_support_widget’, ‘Dashboard’, ‘hk_dashboard_content’);
}
function hk_dashboard_content() { ?>
<div class=”default-container”>
<h2>TRUY CẬP NHANH</h2>
<hr>
</div>
<div class=”icon-container”>
<div class=”column”>
<a href=”/wp-admin/edit.php?post_type=page” class=”pages”>Tất cả Trang</a>
</div>
<div class=”column”>
<a href=”/wp-admin/post-new.php?post_type=page” class=”add”>Trang mới</a>
</div>
<div class=”column”>
<a href=”/wp-admin/edit.php” class=”posts”>Tất cả Bài viết</a>
</div>
<div class=”column”>
<a href=”/wp-admin/post-new.php” class=”add”>Bài viết mới</a>
</div>
<div class=”column”>
<a href=”/wp-admin/media-new.php” class=”media”>Upload Media</a>
</div>
<div class=”column”>
<a href=”/wp-admin/plugin-install.php” class=”plugin”>Cài mới Plugin</a>
</div>
<div class=”column”>
<a href=”wp-admin/theme-install.php” class=”theme”>Cài mới Theme</a>
</div>
<div class=”column”>
<a href=”/wp-admin/options-general.php” class=”settings”>Cài đặt</a>
</div>
</div>
<!– STYLE CSS –>
<style>
#wpbody-content #dashboard-widgets #postbox-container-1 {
width: 100%;
}
.default-container {
display: grid;
grid-template-columns: 1fr;
padding: 20px 20px 0px 20px;
text-align: center;
}
.default-container hr {
height: 3px;
background: #ebebeb;
border: none;
outline: none;
width:10%;
margin:1em auto;
position: relative;
}
.icon-container {
display: grid;
grid-template-columns: 1fr 1fr 1fr 1fr;
padding: 20px;
text-align: center;
}
@media (max-width: 520px) {
.icon-container {
grid-template-columns: none;
padding: 0px;
}
}
@media (min-width: 521px) and (max-width: 767px) {
.icon-container {
grid-template-columns: 1fr 1fr;
padding: 0px;
}
}
@media (min-width: 768px) and (max-width: 990px) {
.icon-container {
grid-template-columns: 1fr 1fr 1fr;
padding: 0px;
}
}
.icon-container .column {
background: #fff;
box-shadow: rgba(149, 157, 165, 0.2) 0px 8px 24px;
color: #000;
font-family: “Ubuntu”, sans-serif;
font-size: 16px;
margin: 3%;
padding: 30px;
transition: background-color 0.5s ease;
text-transform: uppercase;
text-align: center;
text-decoration: none;
}
.icon-container .column a {
color: #000;
text-decoration: none;
}
.icon-container .column a:before {
font-family: “dashicons”;
font-size: 34px;
display: block;
color: #2681B0;
margin-bottom: 4px;
}
.icon-container .column:hover {
background: #f9f9f9;
}
.icon-container .pages:before {
content: “\f123”;
}
.icon-container .posts:before {
content: “\f109”;
}
.icon-container .add:before {
content: “\f133”;
}
.icon-container .media:before {
content: “\f104”;
}
.icon-container .plugin:before {
content: “\f106”;
}
.icon-container .theme:before {
content: “\f100”;
}
.icon-container .settings:before {
content: “\f108”;
}
</style>
<?php }
add_action(‘wp_dashboard_setup’, ‘hk_welcome_dashboard’);
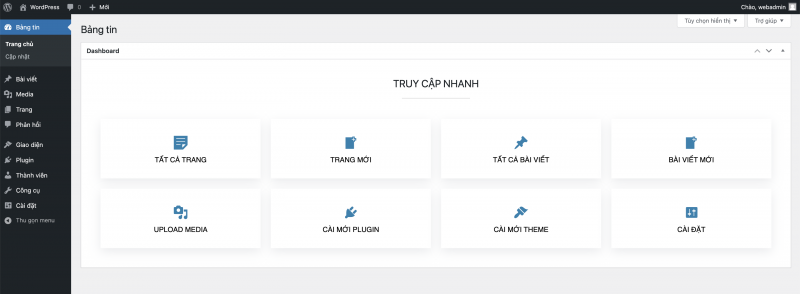
Như vậy thế là xong rồi bạn nhé kết quả là như hình dưới đây.
Xem thêm: Hướng dẫn cách redirect từ HTTPS về HTTP với file .htaccess?
Chúc bạn thành công !
Các bài đã đăng
 Hướng dẫn cách sử dụng ChatGPT trên Microsoft Bing
 Thiết kế website điện máy I-TECH tại Vĩnh Phúc
 Thiết kế hồ sơ năng lực công ty Vĩnh Thịnh nghành Nhôm Kính, xây dựng
 Mẫu website công ty thi công nội thất – Xây dựng
 Thiết kế website tại Hậu Giang
 Quay video quảng cáo sản phẩm cho Giấy Lan Dũng tại Bắc Ninh
 Ôn Tập Bài Thi Cơ bản về quảng cáo google ads (google Partners)
 Tự động thêm .html vào cuối URL của bài đăng hoặc trang trong wordpress
 Mẫu website thiết bị khu công nghiệp
 Chèn thẻ h1 trong wordpress vào trang homepage
 Làm sao để chuyển đổi web wordpress thành App trên điện thoại
 Đào tạo tin học văn phòng từ cơ bản tới nâng cao tại Phú Thọ
 Thiết kế website công ty thành lập doanh nghiệp tại Vĩnh Phúc
 Share Full code Free Mẫu Website bán xe ô tô toyota cực đẹp
 Plugin Tabs Block tạo nội dung theo Tabs
 Thiết kế web bán phân phối Sữa chuyên nghiệp chuẩn SEO
 Thiết kế website tại Hải Dương
 Mẫu website bất động sản An Bình Plaza